When your business is booming it can be tough to reach out to every potential customer that might need your business. That’s why mHelpDesk sets you up with automated notifications that can be triggered by actions in the app. It takes the manual work out of establishing first contact with your leads which is particularly important in the field service industry. Did you know that 70% of homeowners will hire the first person that contacts them? This is where mHelpDesk will help and once you’ve won the job, you can also use text message notifications to send automated appointment reminders and job updates to your customers.
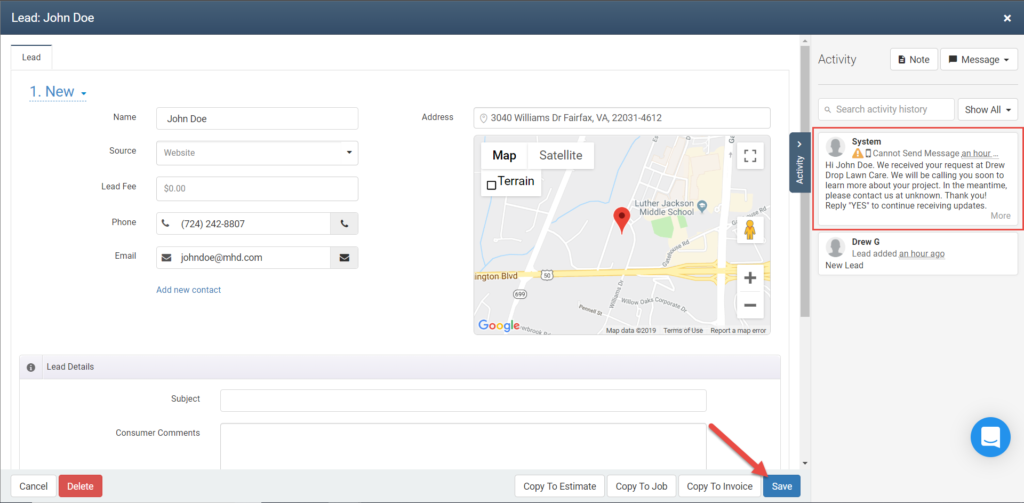
Today, we’re looking at the text message notification that can be sent out to your new leads, which can help you win more business by making contact as soon as that lead is entered into your account. It’s really easy to use! Once you’ve filled out the lead information and clicked the Save button, that text message will be sent out to your lead so you don’t need to worry about texting them yourself. In addition, you can customize the message so your leads get any information you’d like them to receive up front.
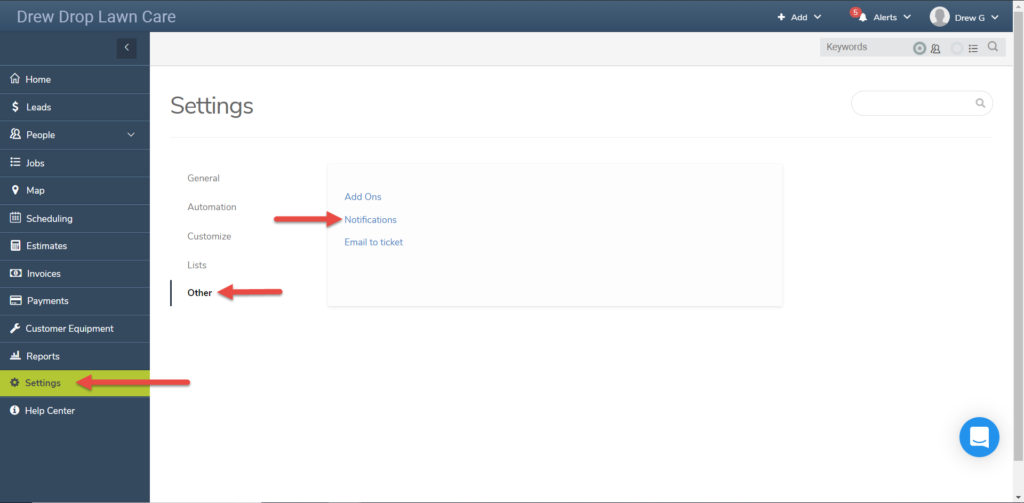
To turn on the new lead text message notification, first head to Settings in your account. Then, click Other and select Notifications. Here in the Notification Settings page, you’ll see all the different automatic notifications you can set up in your account with Email settings up top and Text Message notifications below
Scroll down to the Text Message notification settings and you’ll see it’s split into three groups based on who will receive the notification you’re activating: Assigned Staff, Admin, and Customer.
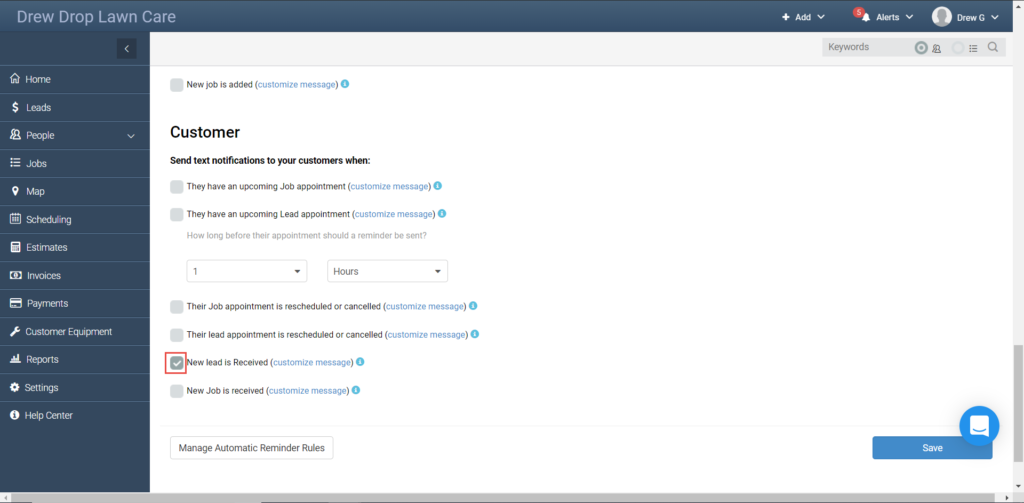
Let’s head to the Customer section. In here, click the box next to the notification named “New lead is received” to activate the notification. Now, whenever a new lead is entered into your account, they’ll receive a text message from your account
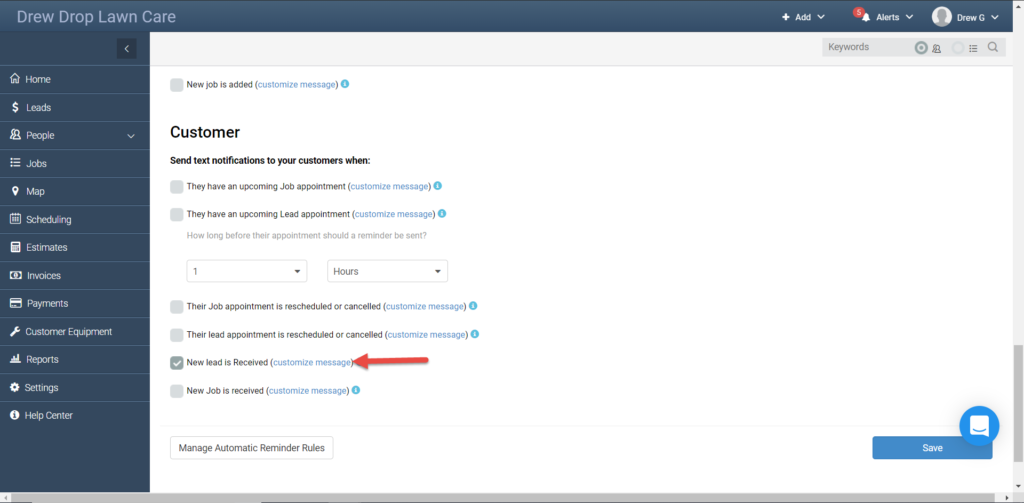
Before we leave this screen, let’s customize the message to ensure our customers are getting the information they need. To do so, click the Customize Message link next to the notification.
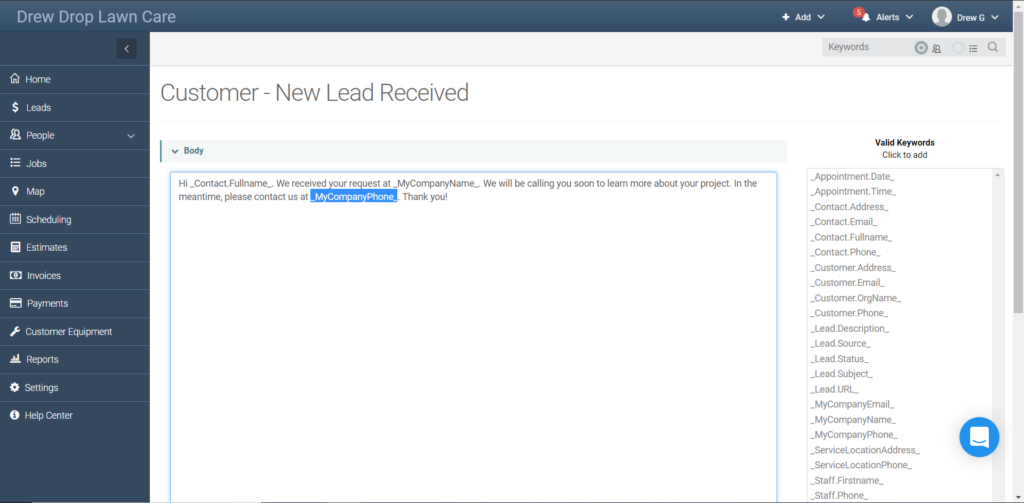
In this screen, you’ll see the message that your customers receive. Anything written normally will appear as written, but anything with an underscore before and after it is known as a “keyword.” A keyword will pull information dynamically from your account so you don’t need to customize each text message with unique information. As an example, the keyword _Contact.Fullname_ will pull the full name of the contact for the specific lead that triggered the message.
Let’s say we prefer our customers to contact us via email rather than phone. To encourage this, we can remove the _MyCompanyPhone_ keyword and replace it with the _MyCompanyEmail_ keyword. To do so, simply highlight the _MyCompanyPhone_ keyword and hit delete on your keyboard.
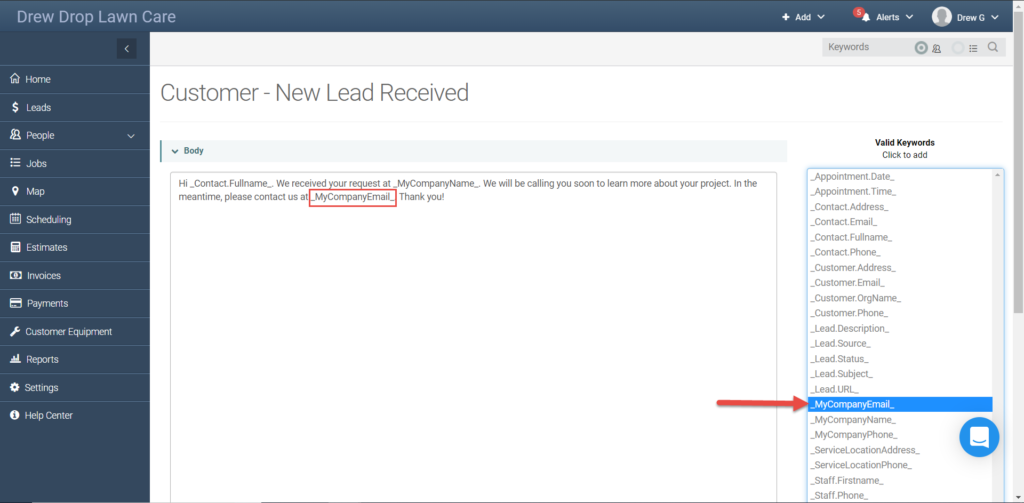
Then, find the _MyCompanyEmail_ keyword in the valid keyword like on the right side of the screen and click it. This will add the keyword to the section of the message where you have your cursor.
We’ve made a small change to the message template, but you can make a variety of changes to make it fit your business’s needs.. You can add more keywords or even change the wording completely as you see fit! Use this and other notification messages to make sure you’re sending the message you want to send to your customers and staff, when you want and with total ease.
We hope you liked this tip! Come back to our blog every Tuesday for a new tip of the week, bookmark this page or follow us on Facebook and Twitter to know as soon as we have a new tip up! Want to suggest a future topic? Leave us a message below!
Reach out to our Account Support Team via phone
+1(888) 558-6275 ext. 2 or chat (within our web or mobile app)
with any questions or concerns!
Last modified: June 17, 2019