When you’re looking to do some targeted email marketing, the biggest struggle can be narrowing down your customer data to make sure you’re targeting the right segment to maximize the impact of your campaign. With mHelpDesk, your customer data is stored all in one place and easy to filter, so you can easily target the right customers and to give your campaign maximum return.
Let’s say you’re expanding into a new territory and want to run a promotion in that area and send an email coupon to the customers in your mHelpDesk account, but only those in that respective area. All you need to do is put together a quick filter, export the resulting list, then import that list into your email marketing tool and you’ll be golden!
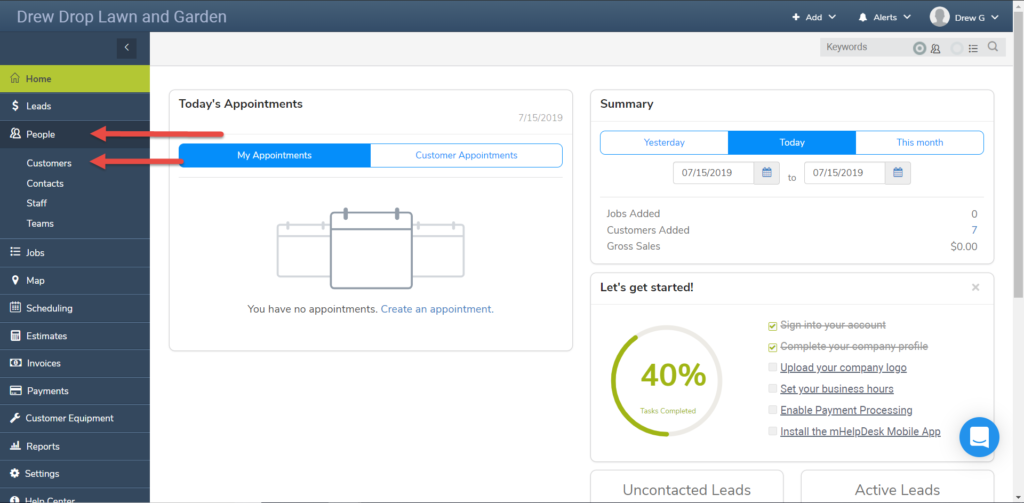
To start, Click the People tab in the main navigation bar, then click Customers.
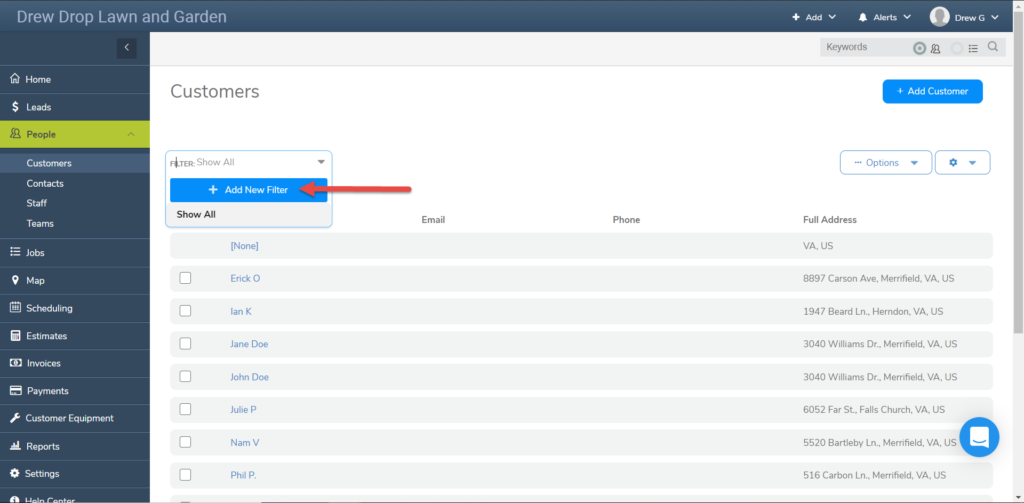
This will take you to the main customer screen. At the top left of the customers screen you’ll see the filter menu. Click into it and click Add New Filter to begin making your custom filter.
For the first field, click into it and select the option Zip/Postal Code.
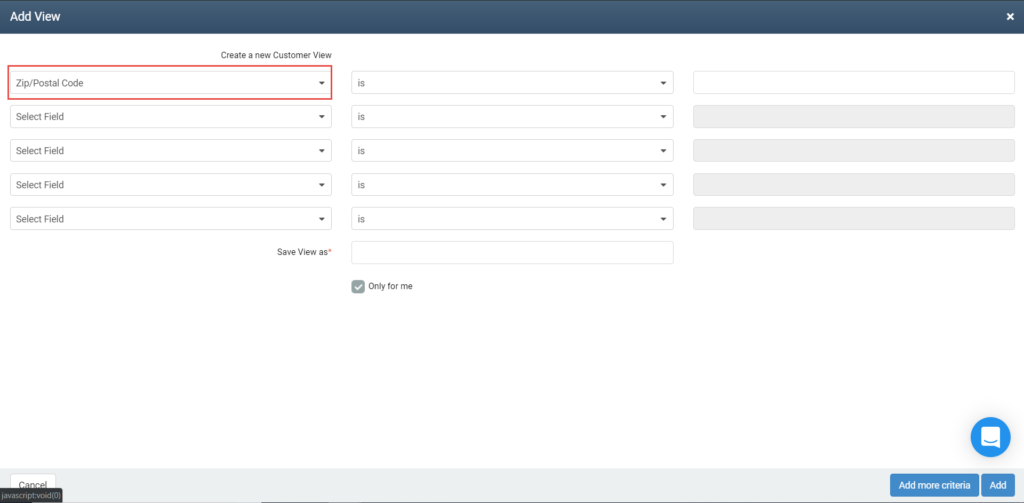
This will set it up to filter based on the zip code you have entered for your customers. Leave the middle field as “is” to make an inclusive filter.
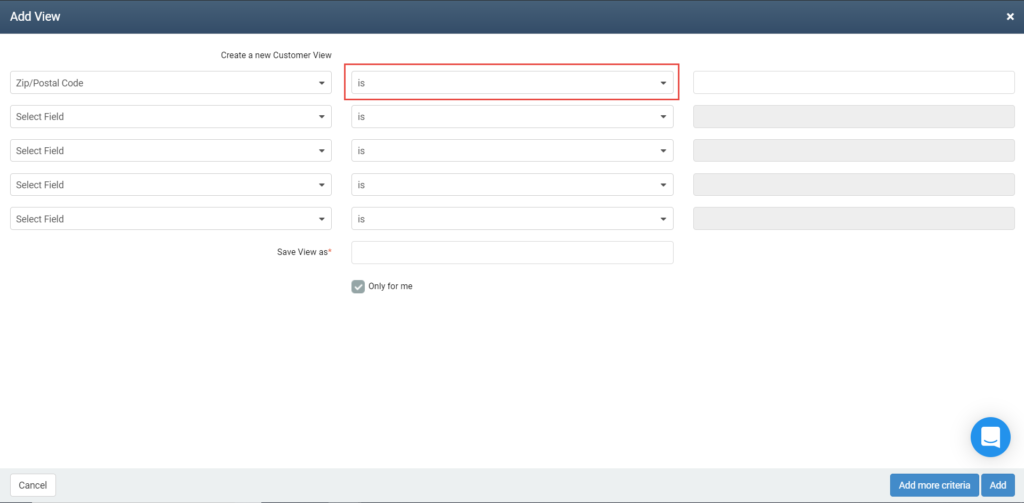
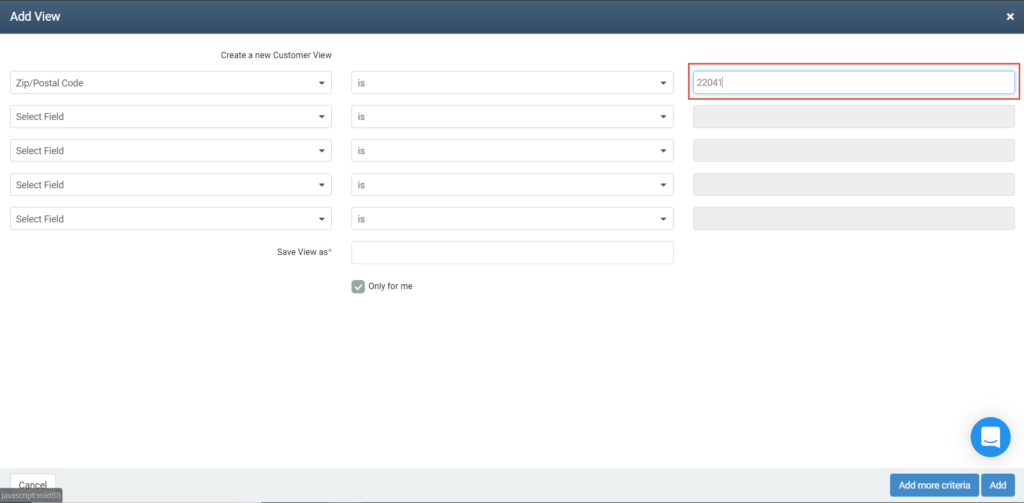
In the third field enter the zip code of the territory you’d like to target.
Then give your filter a name.
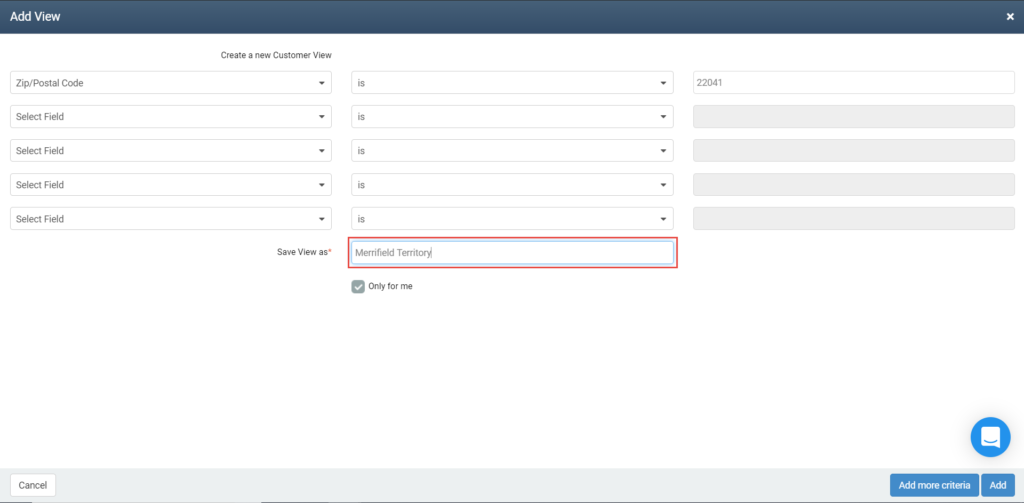
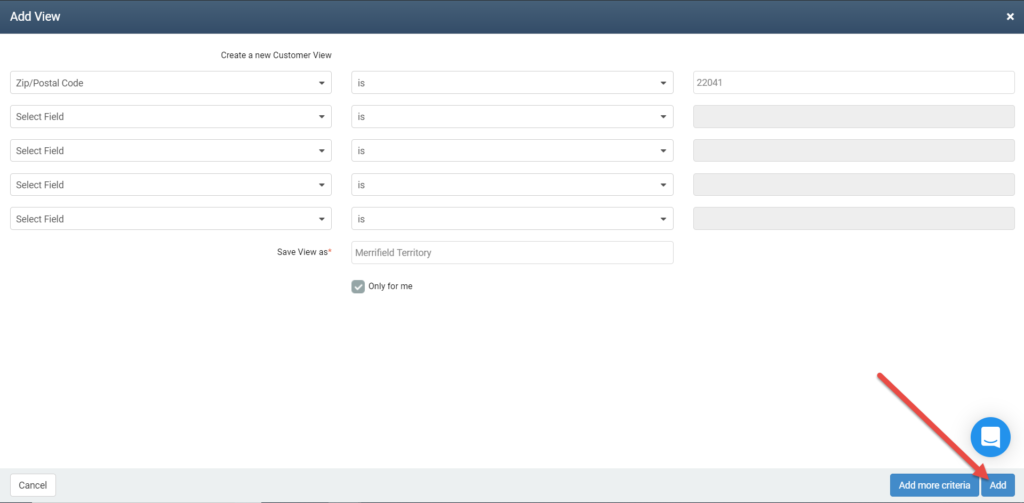
Most users creating a filter like this will name the filter after the territory or zip code they’re filtering for so they can use it again later. One you’re done, click Add to create your filter!
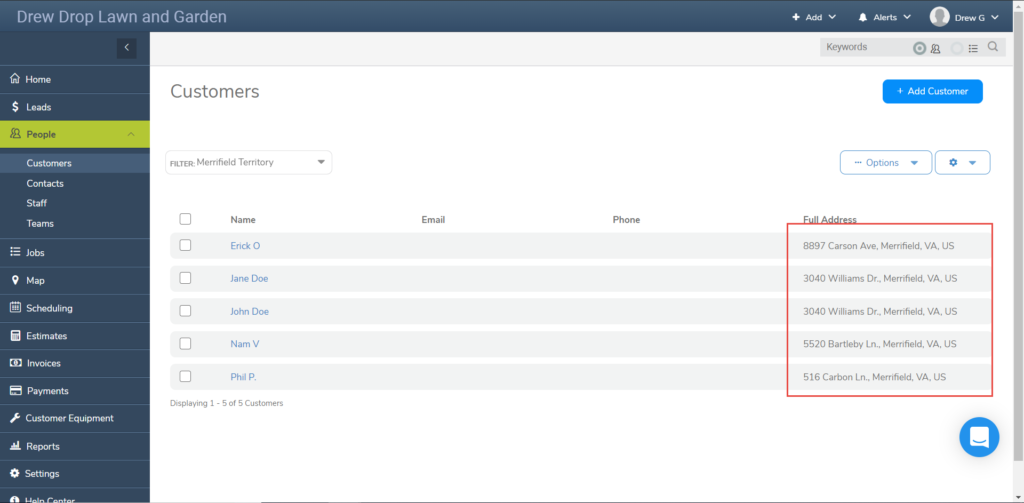
You’ll be returned to the main customer screen with your filter applied, and you’ll notice you’re now only seeing those customers in the territory you’re looking to target.
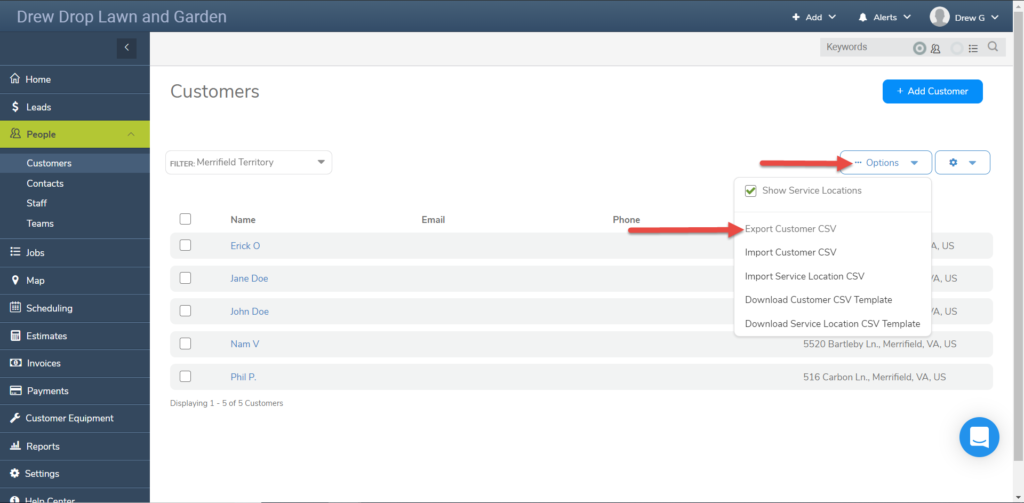
Now all you need to do is get that filtered list out of your account. Just click the Option button, then select Export Customer CSV and that filtered list will be sent to your email inbox.
Once you’ve got the filtered list you can upload it into your email marketing tool or app. And the best part? That filter you made can be applied to your customer list over and over, so as you add new customers from that territory into your account, you’ll automatically see them in that filter for any future targeted marketing campaigns!
We hope you liked this tip! Come back to our blog every Tuesday for a new tip of the week, bookmark this page or follow us on Facebook and Twitter to know as soon as we have a new tip up! Want to suggest a future topic? Leave us a message below!
Reach out to our Account Support Team via phone
+1(888) 558-6275 ext. 2 or chat (within our web or mobile app)
with any questions or concerns!
Last modified: August 28, 2019