
mHelpDesk templates ensure that the estimates, work orders, and invoices your customer receive are stunning and professional. It’s easy to go with our default template that’s set up in your mHelpDesk account (the Black Diamond template), but we’ve also got 6 other options from our free template library. Choose the one that best represents your business and will be attractive to your customers.
To view the template library, you can access the Help Center in your account by selecting it from the main navigation bar. Then, simply search for View Template Library and click into the article. You can also follow this link to go to the template library directly.
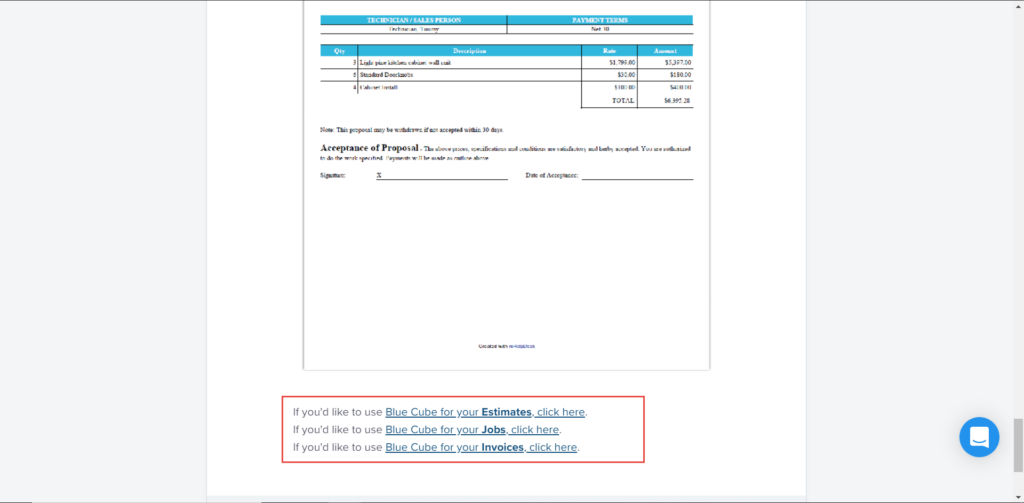
Once in the template Library, you’ll see that each of the 6 styles has a separate option for the Estimate PDF, Job PDF, and Invoice PDF. Click into the appropriate selection for the style you’d like to use. This will take you to the article that has the html you’ll use to adjust your template.
No worries if you aren’t versed in html! All we’ll be doing is simple copy-and-pasting.
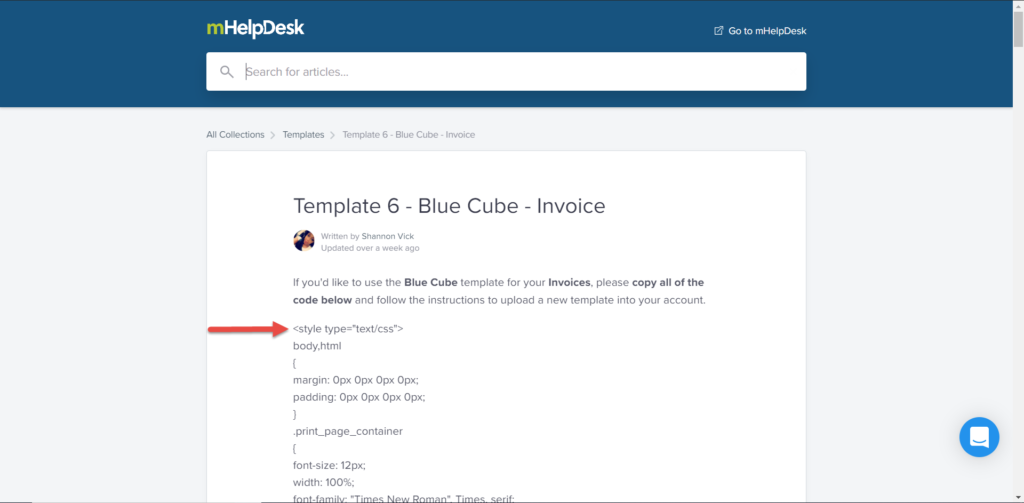
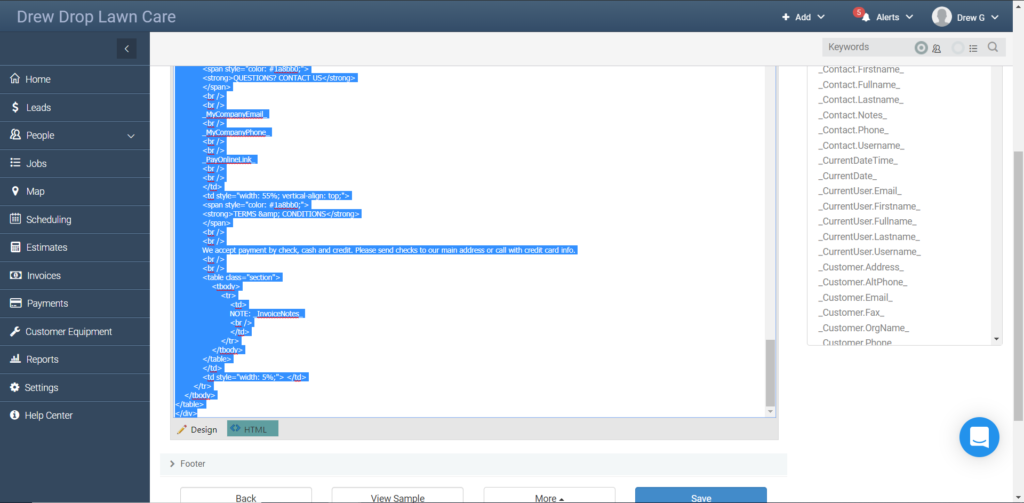
First highlight the html. Start at the top line that says <style type=”text/css”> and click your mouse.
Then drag all the way down to the bottom of the page. Once you hit the line that says </div> just above the emojis you’ll know you’re at the end.
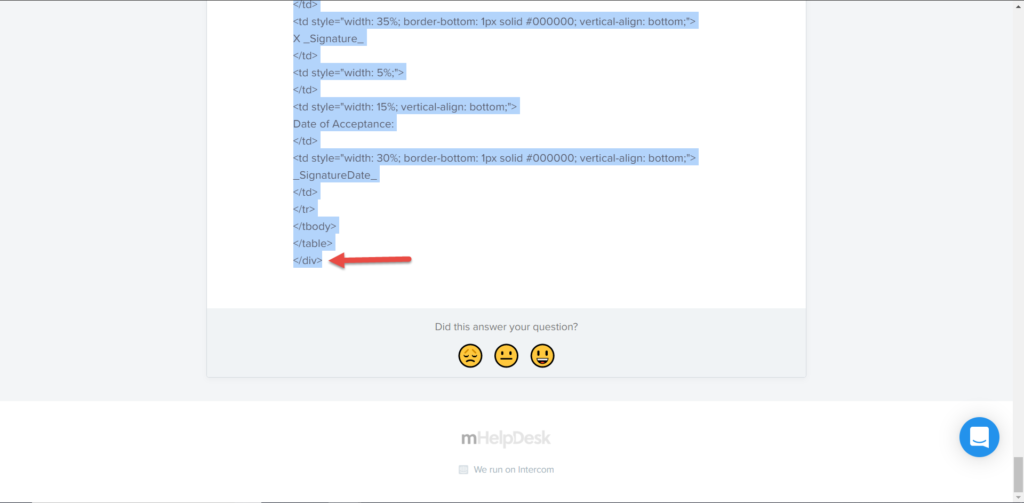
Once you have it all highlighted, right click and select Copy. Now you’re got the highlighted text saved to your computer.
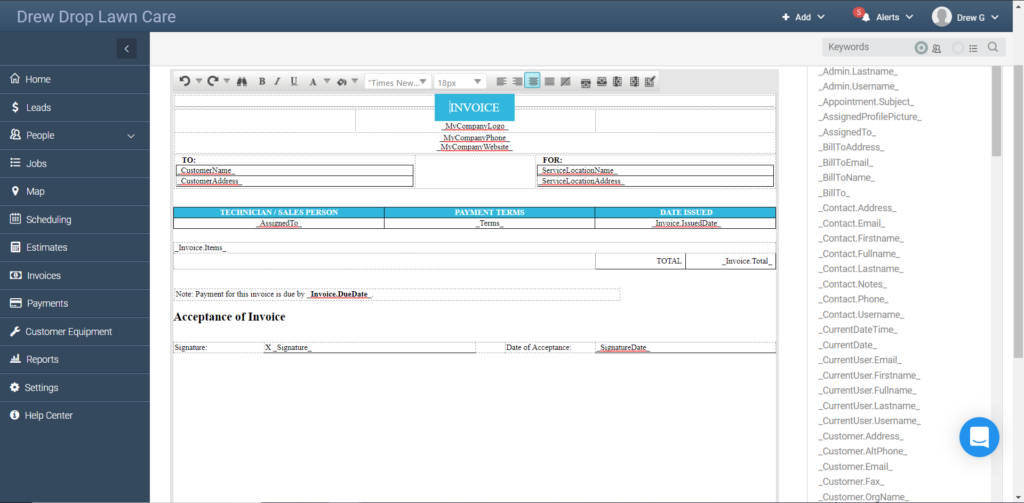
Now we’ll paste the text into your mHelpDesk template. Open mHelpDesk and navigate to Settings using the main navigation bar. Then select Customize, then Templates.
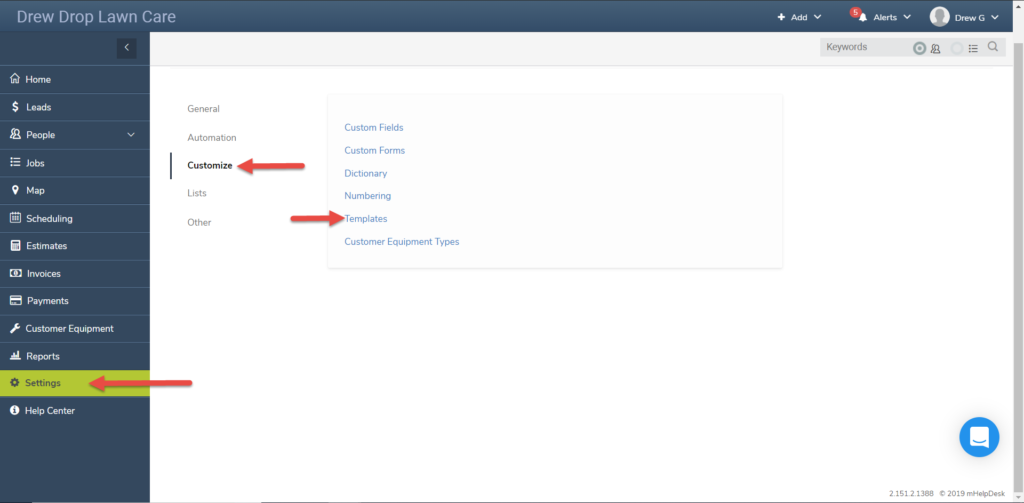
In this screen you’ll see all the different templates in mHelpDesk that you can adjust. Choose the same template here that you copied from the template library.
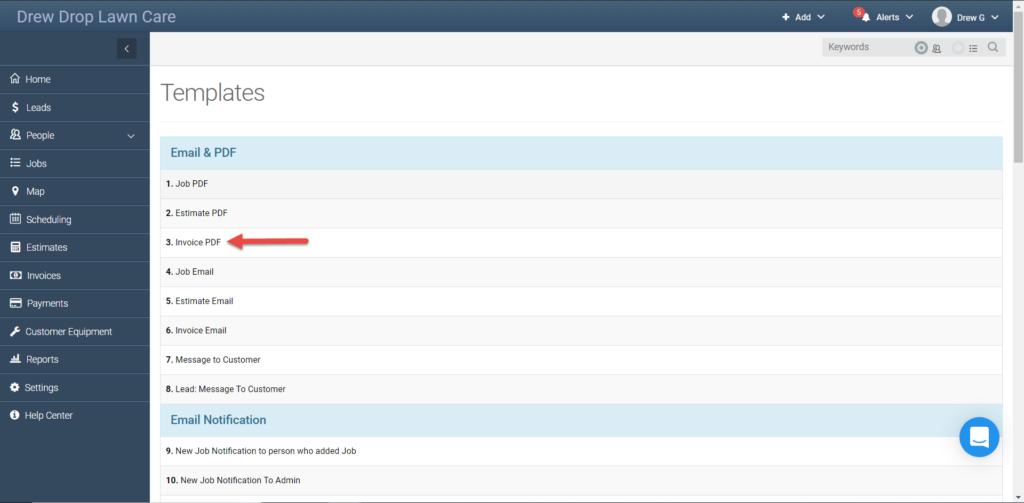
For instance, if you chose the “Blue Cube – Invoice” template from the library, you’ll want to choose Invoice PDF here in your setting.
Once you click into the appropriate template, scroll down and select the html tab.
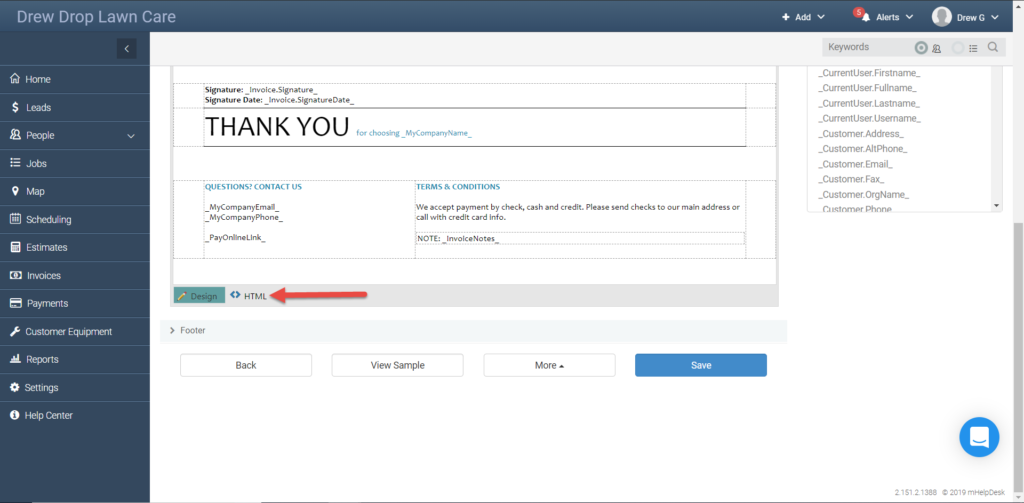
In here you’ll have the html from your current template. Since we’re replacing it all, you can simply highlight the entire contents of the html field and delete it.
If you click into the field, then press CTRL and A at the same time you’ll highlight it all in one go.
After clearing the old html, you can right click and hit Paste. Now you have your new template in place! Click save, then click on the Design tab.
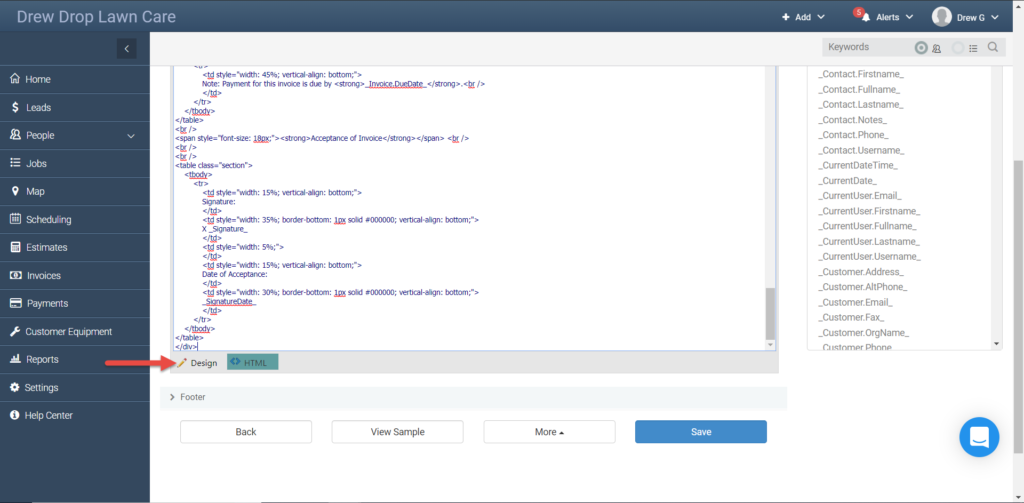
Good job! You’ll now see your new template!
We hope you liked this tip! Come back to our blog every Tuesday for a new tip of the week, bookmark this page or follow us on Facebook and Twitter to know as soon as we have a new tip up! Want to suggest a future topic? Leave us a message below!
Reach out to our Account Support Team via phone
+1(888) 558-6275 ext. 2 or chat (within our web or mobile app)
with any questions or concerns!
Last modified: June 11, 2019