
Following up with customers, either by checking in or sending a next service coupon, is an easy way to win repeat business from your customers. In mHelpDesk, we make it easy to see find recently completed jobs so you can leverage your happy customers and reach out to them to win more business.
In this example, let’s say we have a coupon we like to send our customers a week after we complete a job to encourage them to reach out the next time they need our services.
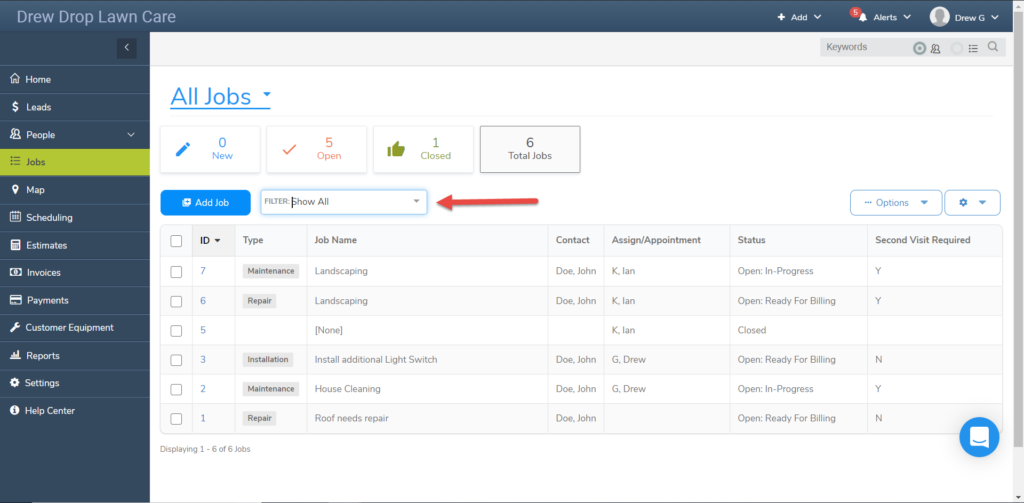
We’ll want to start on the main jobs screen.Here we can set up a filter that we can customize to only show us the jobs we’re interested in. Click into the filter drop down menu, then select Add New Filter to begin.
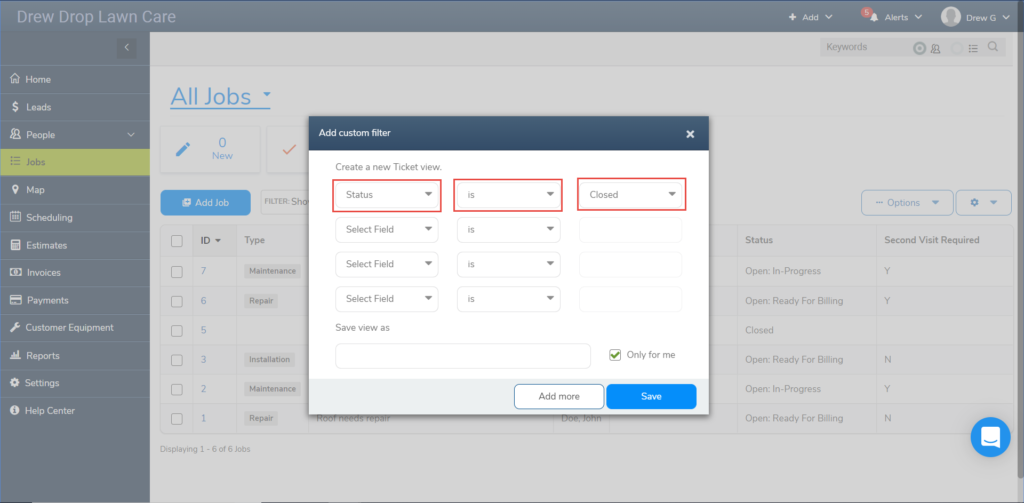
Since we only want to see completed jobs, let’s set up the filter to only show jobs in a Closed status. Click in the first field, then select Status. In the second field we’ll leave it as i to create an inclusive filter. In the third field, we’ll choose the status Closed.
We also want to make sure we’re only sending the follow up coupon to customers from whom we didn’t have any issue collecting payment from. Those jobs we mark with a custom Closed status we’ve created in this account called Closed: No Payment.
We’ll use the next line of the filter to leave out those jobs. Just as with the first we’ll pick Status in the first field. Then we’ll select “Is Not” in the second to ensure the status we’ve chosen is left out.
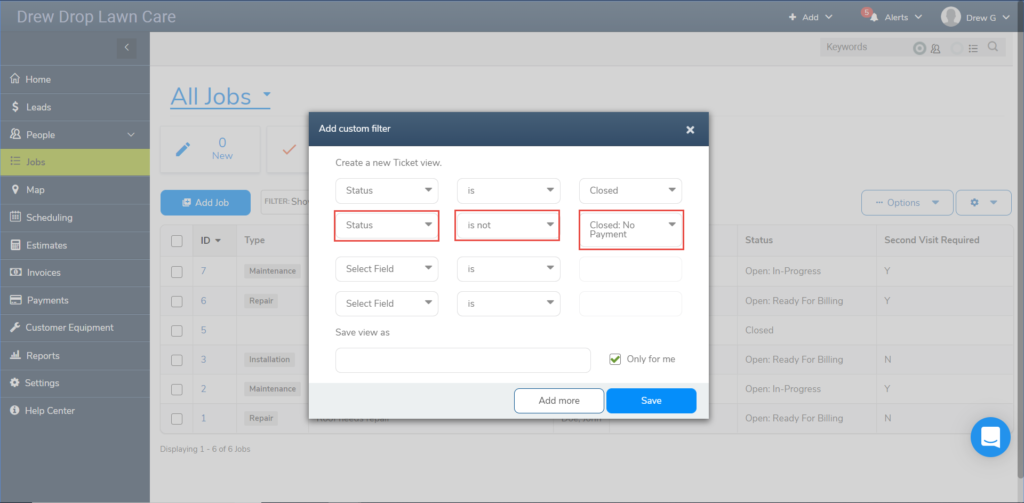
In the last field, we’ll set it to Closed: No Payment to make sure we’re leaving out those non-paying customers.
To make sure we’re only sending the coupon to recently serviced customers, we’ll want to set a timeframe in the last line of the filter. Select Appointment in the first field, then “Is Last Week” in the second. Take note that we don’t have to do anything in the third field since the date range is already chosen in the second.

One thing to keep in mind: If your business doesn’t typically collect payment until a bit longer after work has been completed, you may want to choose the option “Is Last Month” in the second field to better suit your needs.
Now give the filter a name and save it to create your filter!
Once we apply this filter to the main jobs screen, we’re able to see all closed jobs we did for paying customers last week. Then we can simply go into each job and send out our follow up using the message option in the activity log. It’s that easy!

And since we selected a dynamic date for the filter, it will automatically adjust each week to only show us the jobs from the previous week that fit our criteria. This means you don’t need to worry about creating a new filter each week; you can simply keep using the same filter to keep your customers coming back to you whenever they need service.
We hope you liked this tip! Come back to our blog every Tuesday for a new tip of the week, bookmark this page or follow us on Facebook and Twitter to know as soon as we have a new tip up! Want to suggest a future topic? Leave us a message below!
Reach out to our Account Support Team via phone
+1(888) 558-6275 ext. 2 or chat (within our web or mobile app)
with any questions or concerns!
Last modified: May 28, 2019