mHelpDesk Tip of the Week

from Drew G., Senior Technical Support Specialist
![]()
You work with customers, so you know how difficult it can be to remember the tens of twenties of hundreds of follow- ups with customers that it can take to make sure you finish your day with no loose ends. You have sticky notes all over your dashboard and even a couple notes on the back of your hand. But that’s what it takes to be sure you don’t miss any follow-ups and affect your relationships with your customers, right? Well, not necessarily.![]()
With mHelpDesk, you can automate and digitize appointment and follow-up reminders so you don’t have to live your life buried under a mountain of notes or run off your own memory, which we know is not always reliable.
Reminder rules allow you to automatically add a reminder to your or another staff member’s calendar at a set amount of time after a job hits a certain status. With the ability to configure such aspects like for what job types and statuses will trigger it or how long after the criteria are met will the reminder populate, you can use Reminder Rules to handle all kinds of reminders for your team.
![]()
Don’t have mHelpDesk and want a live demo of our Reminder Rules? Request one here >>
How to Set Up Reminder Rules in mHelpDesk:
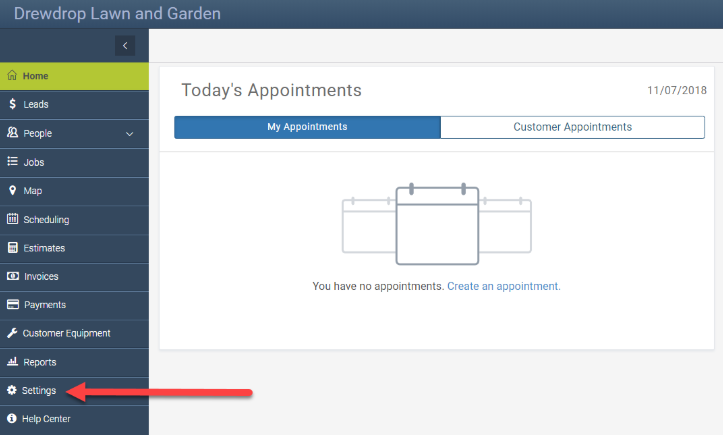
First, login to mHelpDesk and click Settings in the blue left-hand navigation bar in your account. Note: you’ll need to be an Admin in the account in order to set up your reminders.
![]()
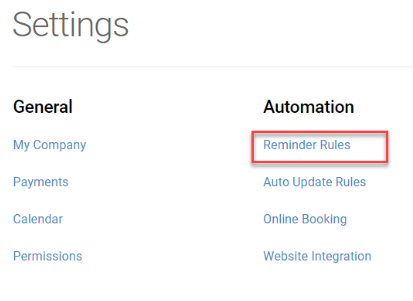
Click on Reminders Rules in the second column under the Automation header.
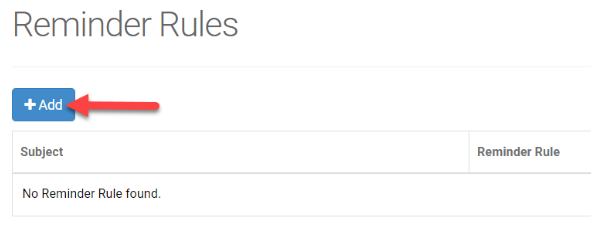
Then click the blue Add Button.
In here we’ve got it broken down into two sections. Let’s start at the top with the Basic Info section.
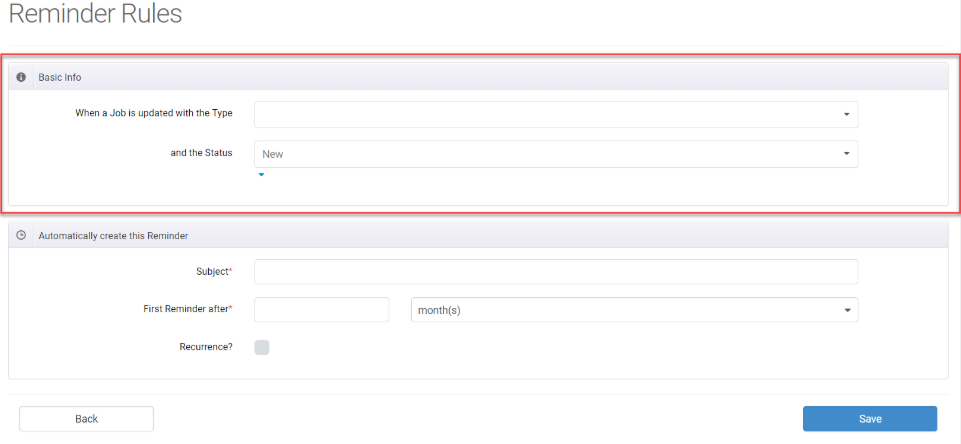
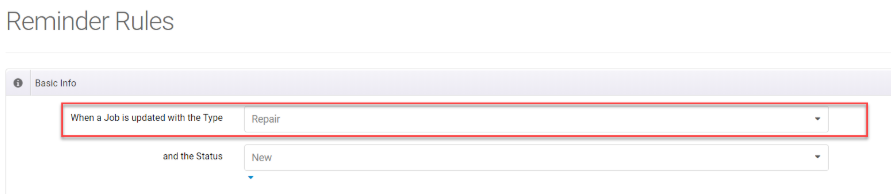
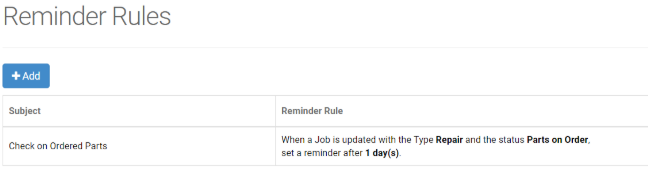
In here you’ll be able to set what Job Type you’d like the reminder to trigger for as well as what Status you’d like to trigger the reminder. For example, let’s say you’re having trouble with your technicians remembering to keep an eye out for parts needed for your repair jobs. In this case, let’s select Repair for the Job Type. This will ensure the rule we’re setting up will trigger only for our Repair jobs.
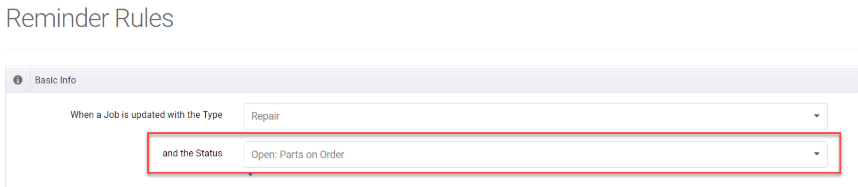
Next, let’s set the Status to Open: Parts on Order. This means that once a job of the chosen type hits the status and parts have been ordered, the reminder will be put on the calendar.
That’s all we need to do to set up our reminder to trigger when we order parts for a repair job!
Let’s move into the lower section, called Automatically create this Reminder, to set up the specifics of what the reminder itself will look like.
In the first section, Subject, let’s write a message that will be displayed on the reminder. In our example, we’ll put, “Check on Ordered Parts.”

Then we’ll set the First Reminder after section to say 1 Day. That way the reminder will populate one day on the calendar after our criteria in the Basic Info section is met.
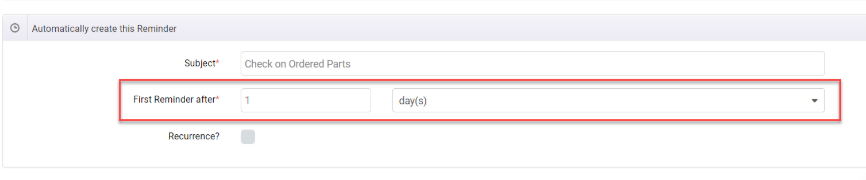
We’ll leave the Recurrence option unchecked for this example. This option gives you the ability to set up the reminder to populate continuously, which is great for reminders regarding service agreements or regular recurring jobs.
And there we have it: a reminder that will help our technicians remember to check on the status of ordered parts the day after the order is put in!
Now we don’t need to worry about those parts, and the customers we need them for, being lost in the shuffle. Reminder rules in mHelpDesk can help you stay organized in your day-to-day duties, taking the burden off of you and your team and making sure you have more time to devote to your customers.
Ready to set up your Reminder Rules? Login to mHelpDesk now >>
Don’t have mHelpDesk? Request a quick tour >>
We hope you liked this tip! Follow us on Facebook, Twitter or Instagram to learn when we post new tips to help you maximize your mHelpDesk account!
Reach out to our Account Support Team via phone
+1(888)558-6275 ext. 2 or chat (within our web or mobile app)
with any questions or concerns!
Last modified: December 5, 2018
